![DIY Violet Rose Body Lotion Bar Recipe [Homemade + Non Greasy]](https://schisandraandbergamot.com/wp-content/uploads/2022/02/diy-body-lotion-bars-recipe-150x150.jpg)
This easy DIY body lotion bar recipe is a must! These homemade lotion bars are non-greasy and leave your skin feeling silky smooth.
![DIY Violet Rose Body Lotion Bar Recipe [Homemade + Non Greasy]](https://schisandraandbergamot.com/wp-content/uploads/2022/02/Pinterest-Pin-Templates-Moon-and-Spoon-and-Yum-1200-x-1200-px-82.jpg)
Why You'll Love This DIY
- It's super easy.
- The results are beautiful and functional.
- These lotion bars are both wonderfully moisturizing, but non greasy.
- They are intoxicatingly fragrant, but not too much so.
- You can keep the dried flowers in the bars for a natural exfoliating effect (I love to do it this way!), or make them silky smooth.
- They store well.
- They are wonderful for self-care and also make great gifts.
- They are packed with skin healing properties.
- Since they are homemade, you know they are free of harmful chemicals and other unnecessary additives.
- They are suitable for sensitive skin.

Ingredient Notes
Sweet almond oil: One of my absolute favorite carrier oils, sweet almond oil is silky and moisturizing but without a greasy feel, making it my top choice for lotion bars. Having said that, any carrier oil you prefer will work in this recipe, so feel free to switch it up. Hemp seed oil, olive oil, jojoba oil, avocado oil and coconut oil work well.
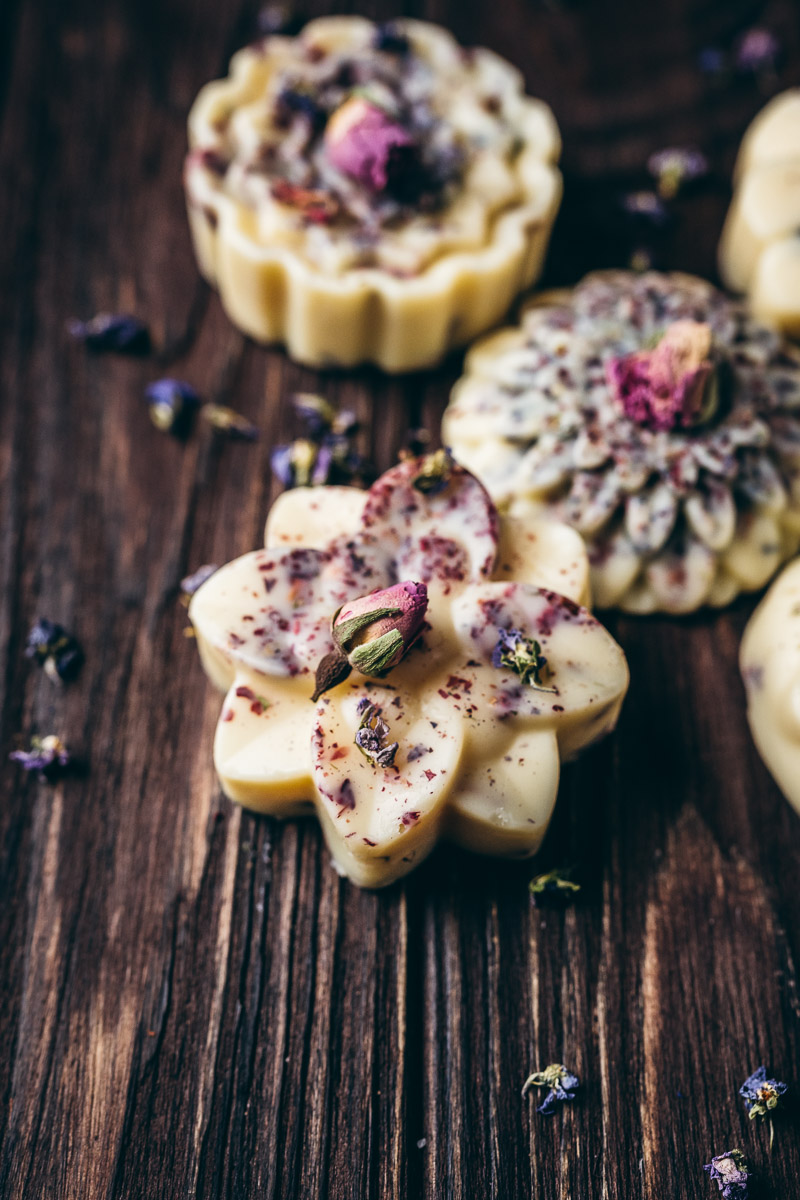
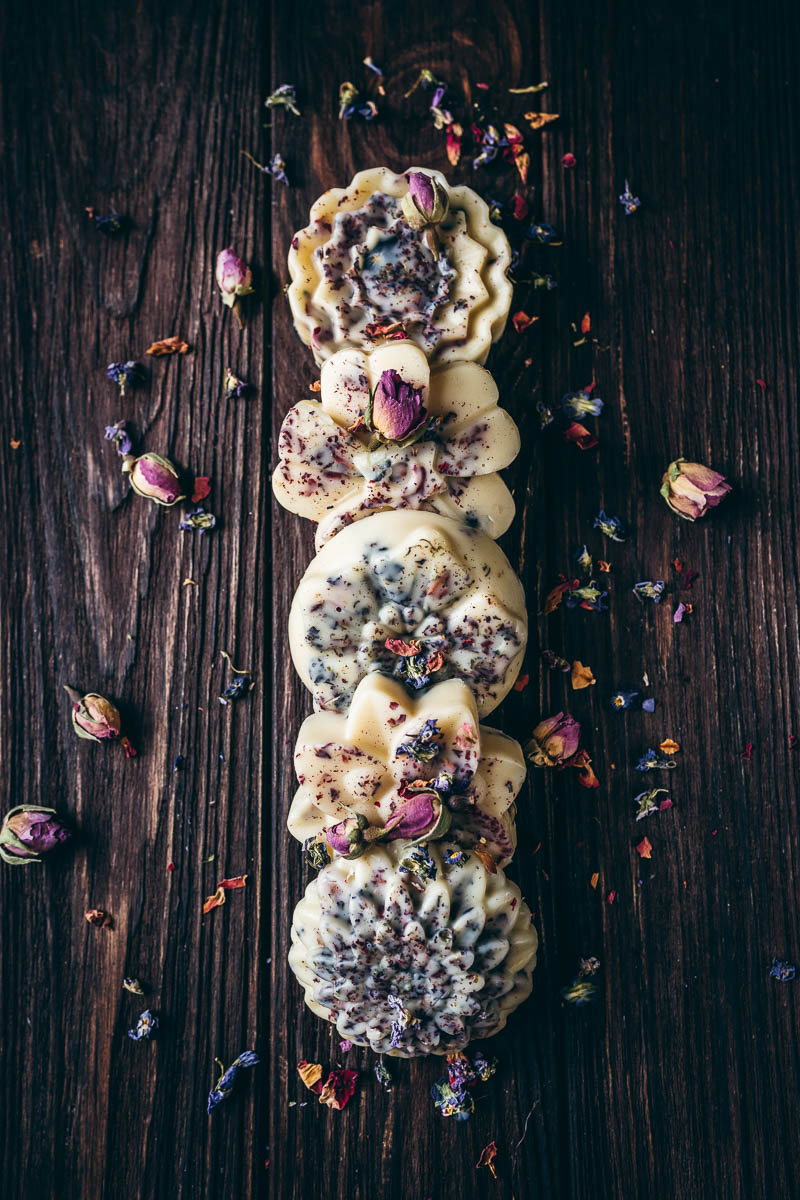
Dried rose petals: I love to use organic culinary grade rose petals, but any dried rose petals will do.
Dried violet blossoms: Violets add the most beautiful pop of color and fragrance to these lotion bars.
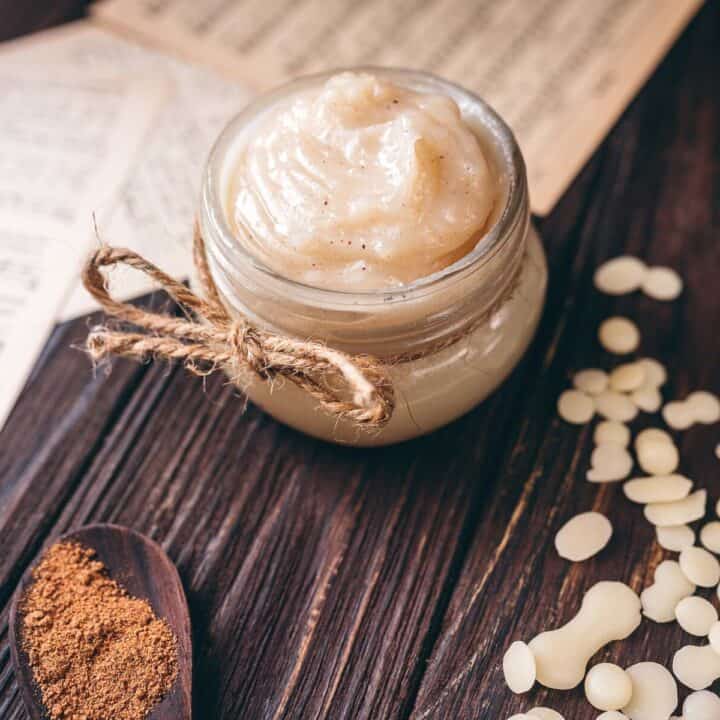
Cocoa butter: Cocoa butter adds a beautiful richness in scent, moisturization, and healing properties. It is protective, soothes irritation, and fades scars and wrinkles. It contains vitamin E and vitamin K.
White beeswax: I think the white color contrasts nicely with the florals, but you can use yellow beeswax if you prefer.
Rose absolute essential oil: This optional ingredient adds additional fragrance for some superpower rose flair.
How to Make Homemade Lotion Bars
- In a small saucepan over low heat add the sweet almond oil, dried rose petals, and dried violet blossoms. Heat until the pan feels warm to the touch (about 3 minutes), then turn off the heat.
- Let the oil infusion sit for at least 1 hour, or until the oil smells as fragrant as you would like. Strain the dried flowers if you would prefer super smooth lotion bars, otherwise, keep them in the oil for visual appeal and to add an exfoliating effect to your lotion bars.
- In a double boiler over medium heat, add the infused oil, cocoa butter, and beeswax. Heat until all liquifies (about 5 minutes).
- Stir in the essential oil, if using, then pour the mixture into silicone molds of your choice.
- Let the bars sit until cool and hardened completely (about 1 hour) before removing from the molds.
- Keep the lotion bars stored in a cool, dark place for up to one year.

Frequently Asked Questions
A lotion bar is lotion in a solid form.
Solid lotion bars rely on body heat to liquify and melt into your skin on contact.
Lotions bars can be rubbed into your heels, elbows, knees and anywhere that needs a little TLC. You can also use them on your lips. They work great after a shower when you can rub the bar into slightly damp skin.
Lotion bars will keep for at least a year with proper care. I like to wrap each individual lotion bar in parchment paper and then place in a metal tin like a candle tin.
You Might Also Like These Easy DIY Recipes
![DIY Violet Rose Body Lotion Bar Recipe [Homemade + Non Greasy]](https://schisandraandbergamot.com/wp-content/uploads/2022/02/Pinterest-Pin-Templates-Moon-and-Spoon-and-Yum-1200-x-1200-px-82-150x150.jpg)
DIY Violet Rose Body Lotion Bar Recipe
Equipment
Materials
- 4 ounces sweet almond oil
- 2 tablespoons dried rose petals
- 2 tablespoons dried violet blossoms
- 4 ounces cocoa butter
- 4 ounces white beeswax
- 15 drops rose absolute essential oil optional
Instructions
- In a small saucepan over low heat add the sweet almond oil, dried rose petals and dried violet blossoms. Heat until the pan feels warm to the touch (about 3 minutes), then turn off the heat.
- Let the oil infusion sit for at least 1 hour, or until the oil smells as fragrant as you would like. Strain the dried flowers if you would prefer super smooth lotion bars, otherwise, keep them in the oil for visual appeal and to add an exfoliating effect to your lotion bars.
- In a double boiler over medium heat, add the infused oil, cocoa butter and beeswax. Heat until all liquifies (about 5 minutes).
- Stir in the essential oil, if using, then pour the mixture into silicone molds of your choice.
- Let the bars sit until cool and hardened completely (about 1 hour) before removing from the molds.
- Keep the lotion bars stored in a cool, dark place for up to one year.
Notes


Comments
No Comments